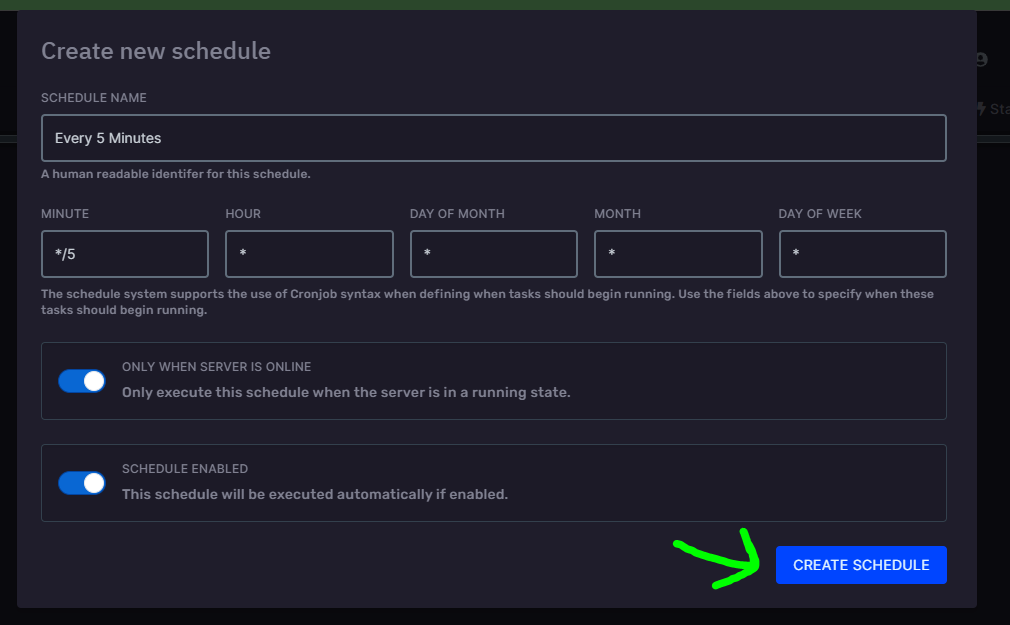
1. Creating a Schedule:

2. Configuring the Schedule:
Upon creating a schedule you configure its name and how often it runs. The time period is configured using the cronjob syntax.
The time period below means the schedule will run every five minutes. Check below for common time periods and how to configure them.

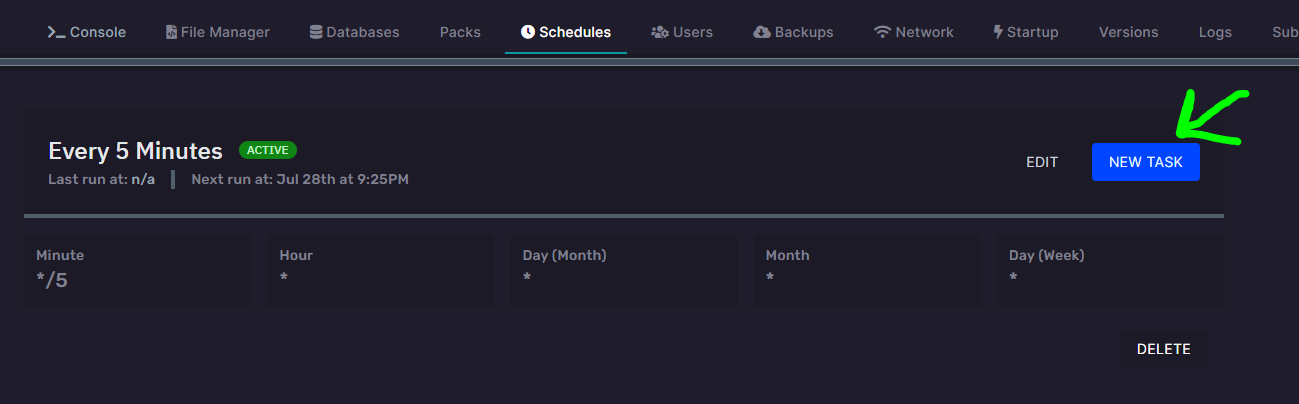
3. Assign a task to the schedule:
After creating the schedule its time to choose what action the schedule performs.
Usable actions are: Send command, send power action and create backup.
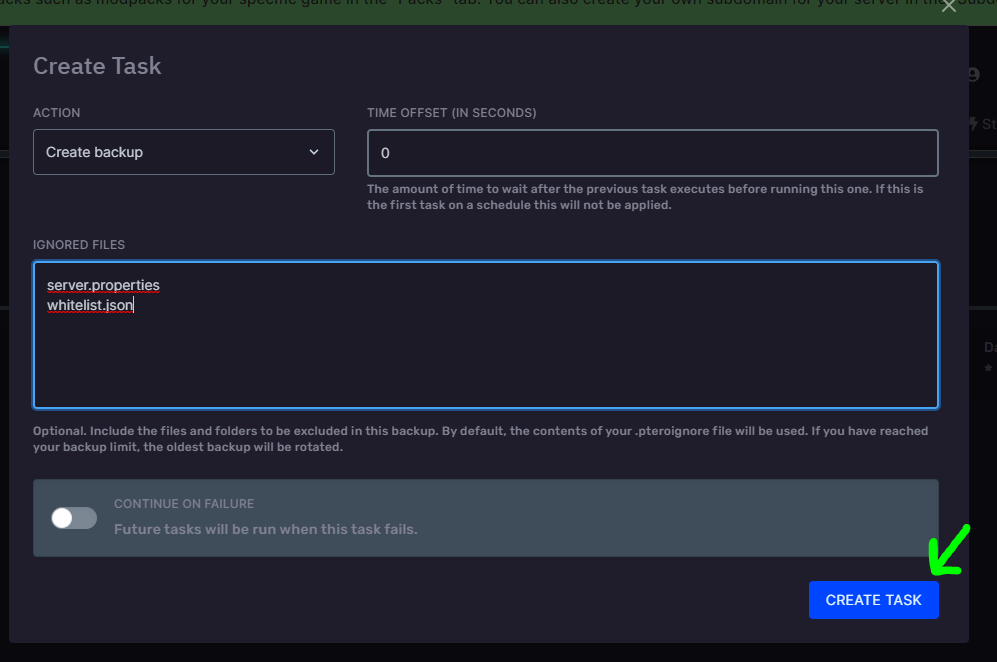
You can choose which files to be ignored and NOT backed up, as well as invert the selection to only backup specific files.
More information and tips on how this field works is provided in our knowledgebase right here. There are tons of features to it.
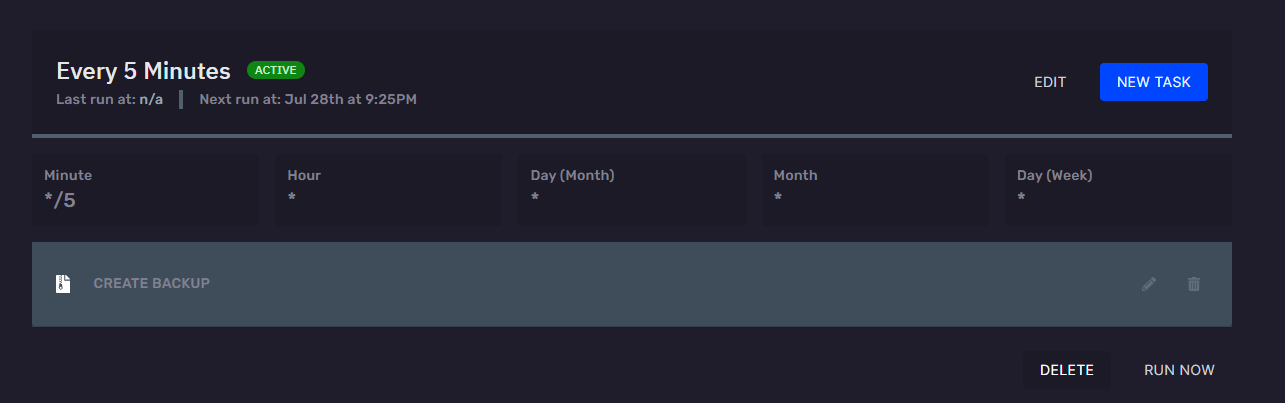
You have now successfully created a backup schedule!
Cronjob example time periods:
Every Minute
Every Five Minutes
Every 10 Minutes
Every 15 Minutes
Every 30 Minutes
Every Hour
Every Two Hours
Every Six Hours
Every 12 Hours
During the Work Day
Every day at Midnight
At the Start of Every Month
On January 1st at Midnight


